Training StyleGAN2 ADA with a custom dataset
An quick guide to StyleGAN and how to train it to generate your own images.
17 December 2021
Fascinated by the artistic opportunities of machine learning and the incredibly realistic images that can be generated, I decided to learn how to use it to create my own images. Here's the results of my exploration.
↑ Interpolation video generated with StyleGAN3.
What are GANs?
Generative adversarial networks (GANs) are machine learning networks that learn patterns in data and then create their own, similar patterns. This means that, for example, by showing a GAN enough pictures of dogs, it’s able to learn what a dog looks like – or at least to learn the pattern of pixel data which makes up a dog picture – and generate its own, new dog pictures.
Unlike other machine learning networks, GANs are made up of two separate networks working against each other, hence the ‘adversarial’ bit in the name. The generator network creates realistic patterns from the data, while the discriminator network identifies which patterns are real and which are fake. During the training process, the generator learns how to create more realistic images and the discriminator gets better at spotting the fakes from the real. Training is complete when the generator is good enough at creating images that the discriminator can only guess correctly by chance.
First released by NVIDIA in 2018, StyleGAN is one of the most well-known image generation GANs as it was used to create thispersondoesnotexist.com and many similar sites. For best results, StyleGAN needs to be trained on tens of thousands of images and requires powerful GPU resources.
In 2020, NVIDIA released StyleGAN2 ADA with a feature that enables new models to be cross-trained from another. By starting with an existing high-quality model and resuming training with a different set of images, it’s possible to get good results with a few thousand images and a lot less computing power.
Building the dataset
I collected around 2700 botanical illustrations from renowned artists such as Pierre Joseph Redouté and Mary Vaux Walcott. I’ve long been a fan of botanical illustration, so I already had many of these images from other projects.
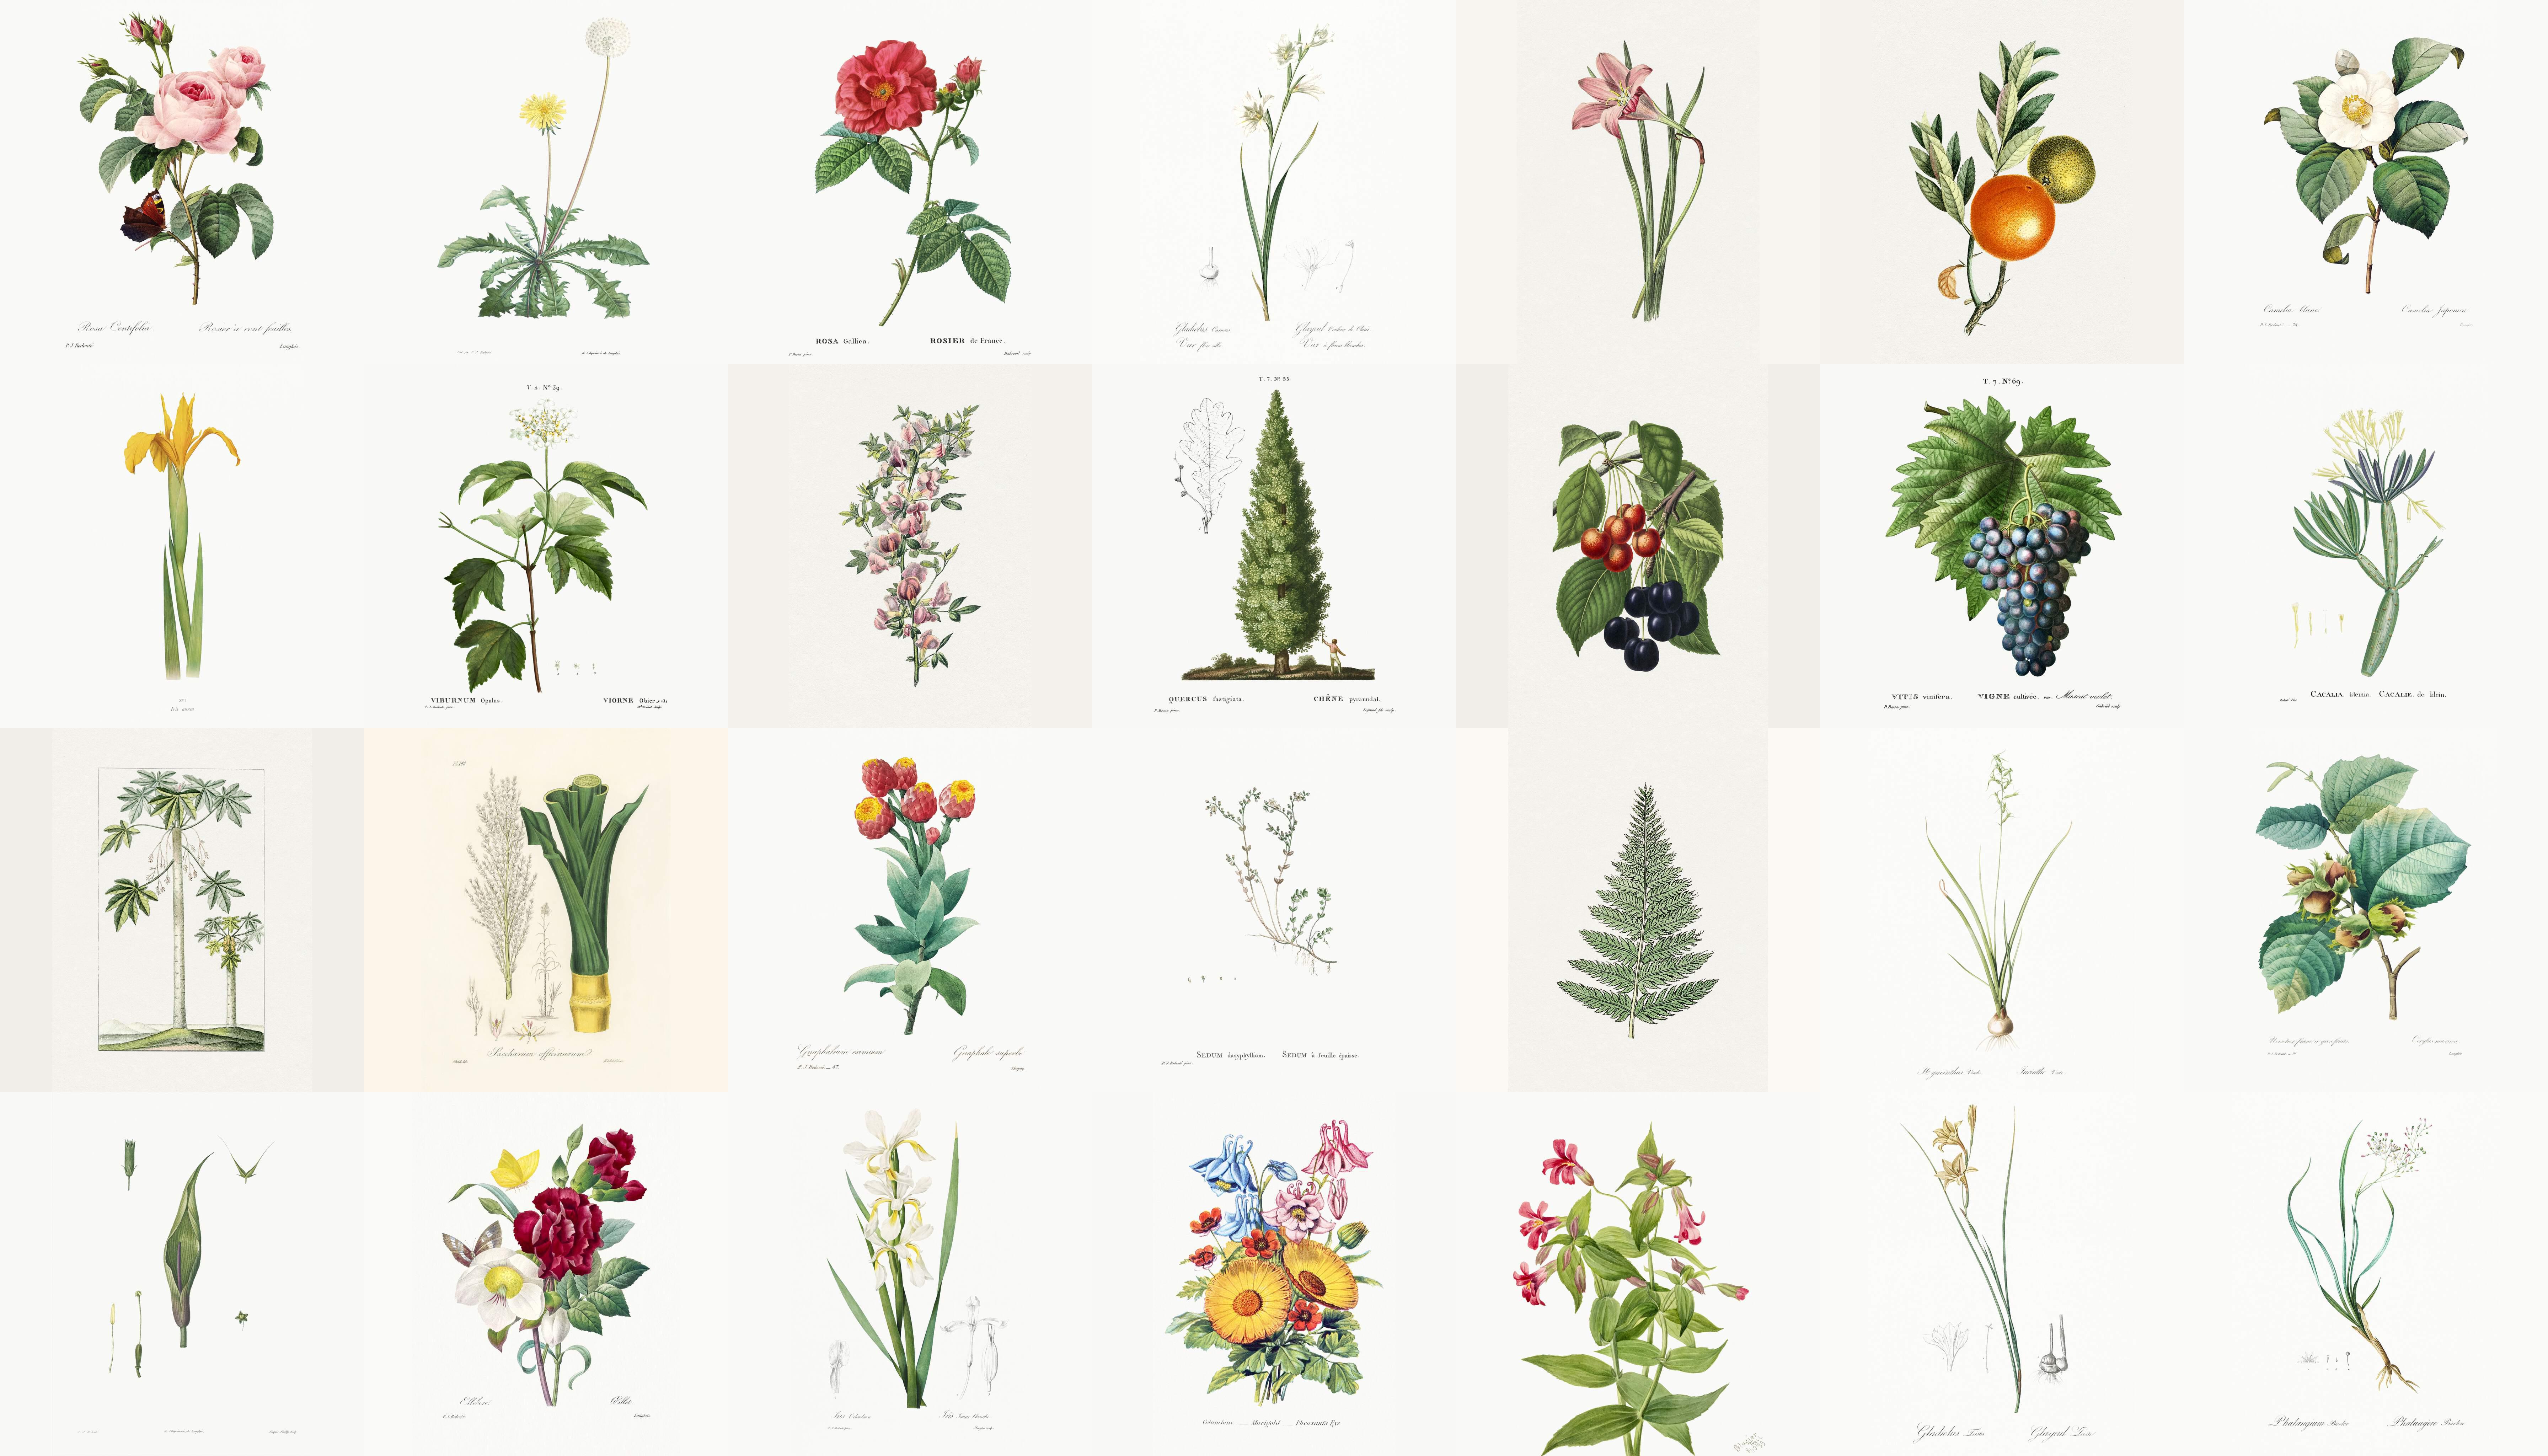
↑ A selection of images from the dataset.
StyleGAN prefers its dataset images to be square, but my source images were all different of shapes and sizes. It would have taken too long to scale edit them all manually, so I wrote an ImageMagick script to do it for me.
for filename in *; do
	magick $filename -crop 1x1+10+10 -scale 1024x1024 \
	( $filename -scale 1024x1024 \)
	-gravity North -composite ../[output-folder]/$filename
done
This script bulk converts all images in a folder, saving them to an output folder. As most of the images were rectangular it wasn’t possible to just crop them square without losing important parts of the flowers, so the script also samples the background colour and fills the entire canvas to avoid blank areas. Luckily this was straightforward as all the images had fairly even backgrounds.
While there’s no real limit to the size source images can be, larger images take longer to train, so I opted for 1024x1024px as a good balance between image resolution and compute time.
Training the model
To train the model I used Google Colab, a Jupyter notebook environment with powerful GPU resources. Various StyleGAN2 ADA notebooks are available, but I used this one by Derrick Schultz as it saves everything to your Google Drive. This means you can resume easily when Colab disconnects, which it will.
If you're using Colab, it's worth getting a Pro or Pro+ subscription as you get access to much more powerful hardware and much longer background execution times.
Preparing the data
The notebook fairly straightforward, but to start training, you will first need to install repo to your Google Drive and install the dependencies. Run each cell in turn, following the instructions.
Next, you’ll need to convert the images to the right format. You’ll only need to do this once per dataset. Upload the dataset to your Google Drive, and set the folder path in dataset_path. To find the folder path, open the file browser, find the folder, and select ‘Copy path’ in the folder’s three-dot menu. The final path should look something like this:
dataset_path = “/content/drive/MyDrive/[foldername]”
Then, choose a name for your dataset. This can be anything you like.
Starting training
- Set
dataset_nameto the name of your model. - Set the
snapshot_count. Snapshots are like save points, so you don’t have to start from scratch when the training stops. They’re produced about every 20 minutes, but this number controls how many to save – e.g. a count of four will save one out of every four. Set it too low and you’ll completely fill up your Drive, set it too high and you’ll lose hours of training whenever Colab times out. - Decide whether to mirror the images. This is a useful way of enlarging the training data by mirroring the images in different directions. Only use this if it doesn’t matter whether your images are mirrored. I set them both to
falseas I didn’t want the plants to be mirrored. - Set the resume_from option to
ffhq1024orffhq512, depending on the size of your images. This loads a high quality model to cross-train your new dataset against. - Run the cell. Colab Pro+ will run for around 24 hours before timing out, Pro and free tiers will stop a lot sooner.
While it’s training
StyleGAN will save snapshots and sample images from the model in your drive as the training progresses in the /results folder.
They’ll look weird at first, as they transition from the original face images to your new dataset.
Resuming training
To resume the training after its’s stopped for whatever reason, set the resume_from option to the path to your latest snapshot and run the cell. It’ll create a new folder in /results and start saving the progress there.
How long to train
I trained my plants model for six full days, but as far as I can tell, there’s no firm guidance as to how long to train for – the size of the dataset and the computing resources available counts for a lot. Sometimes too much training may harm the quality of the results, and lead to problems such as overfitting, where the generated results are too similar to the source data.
Problems with training
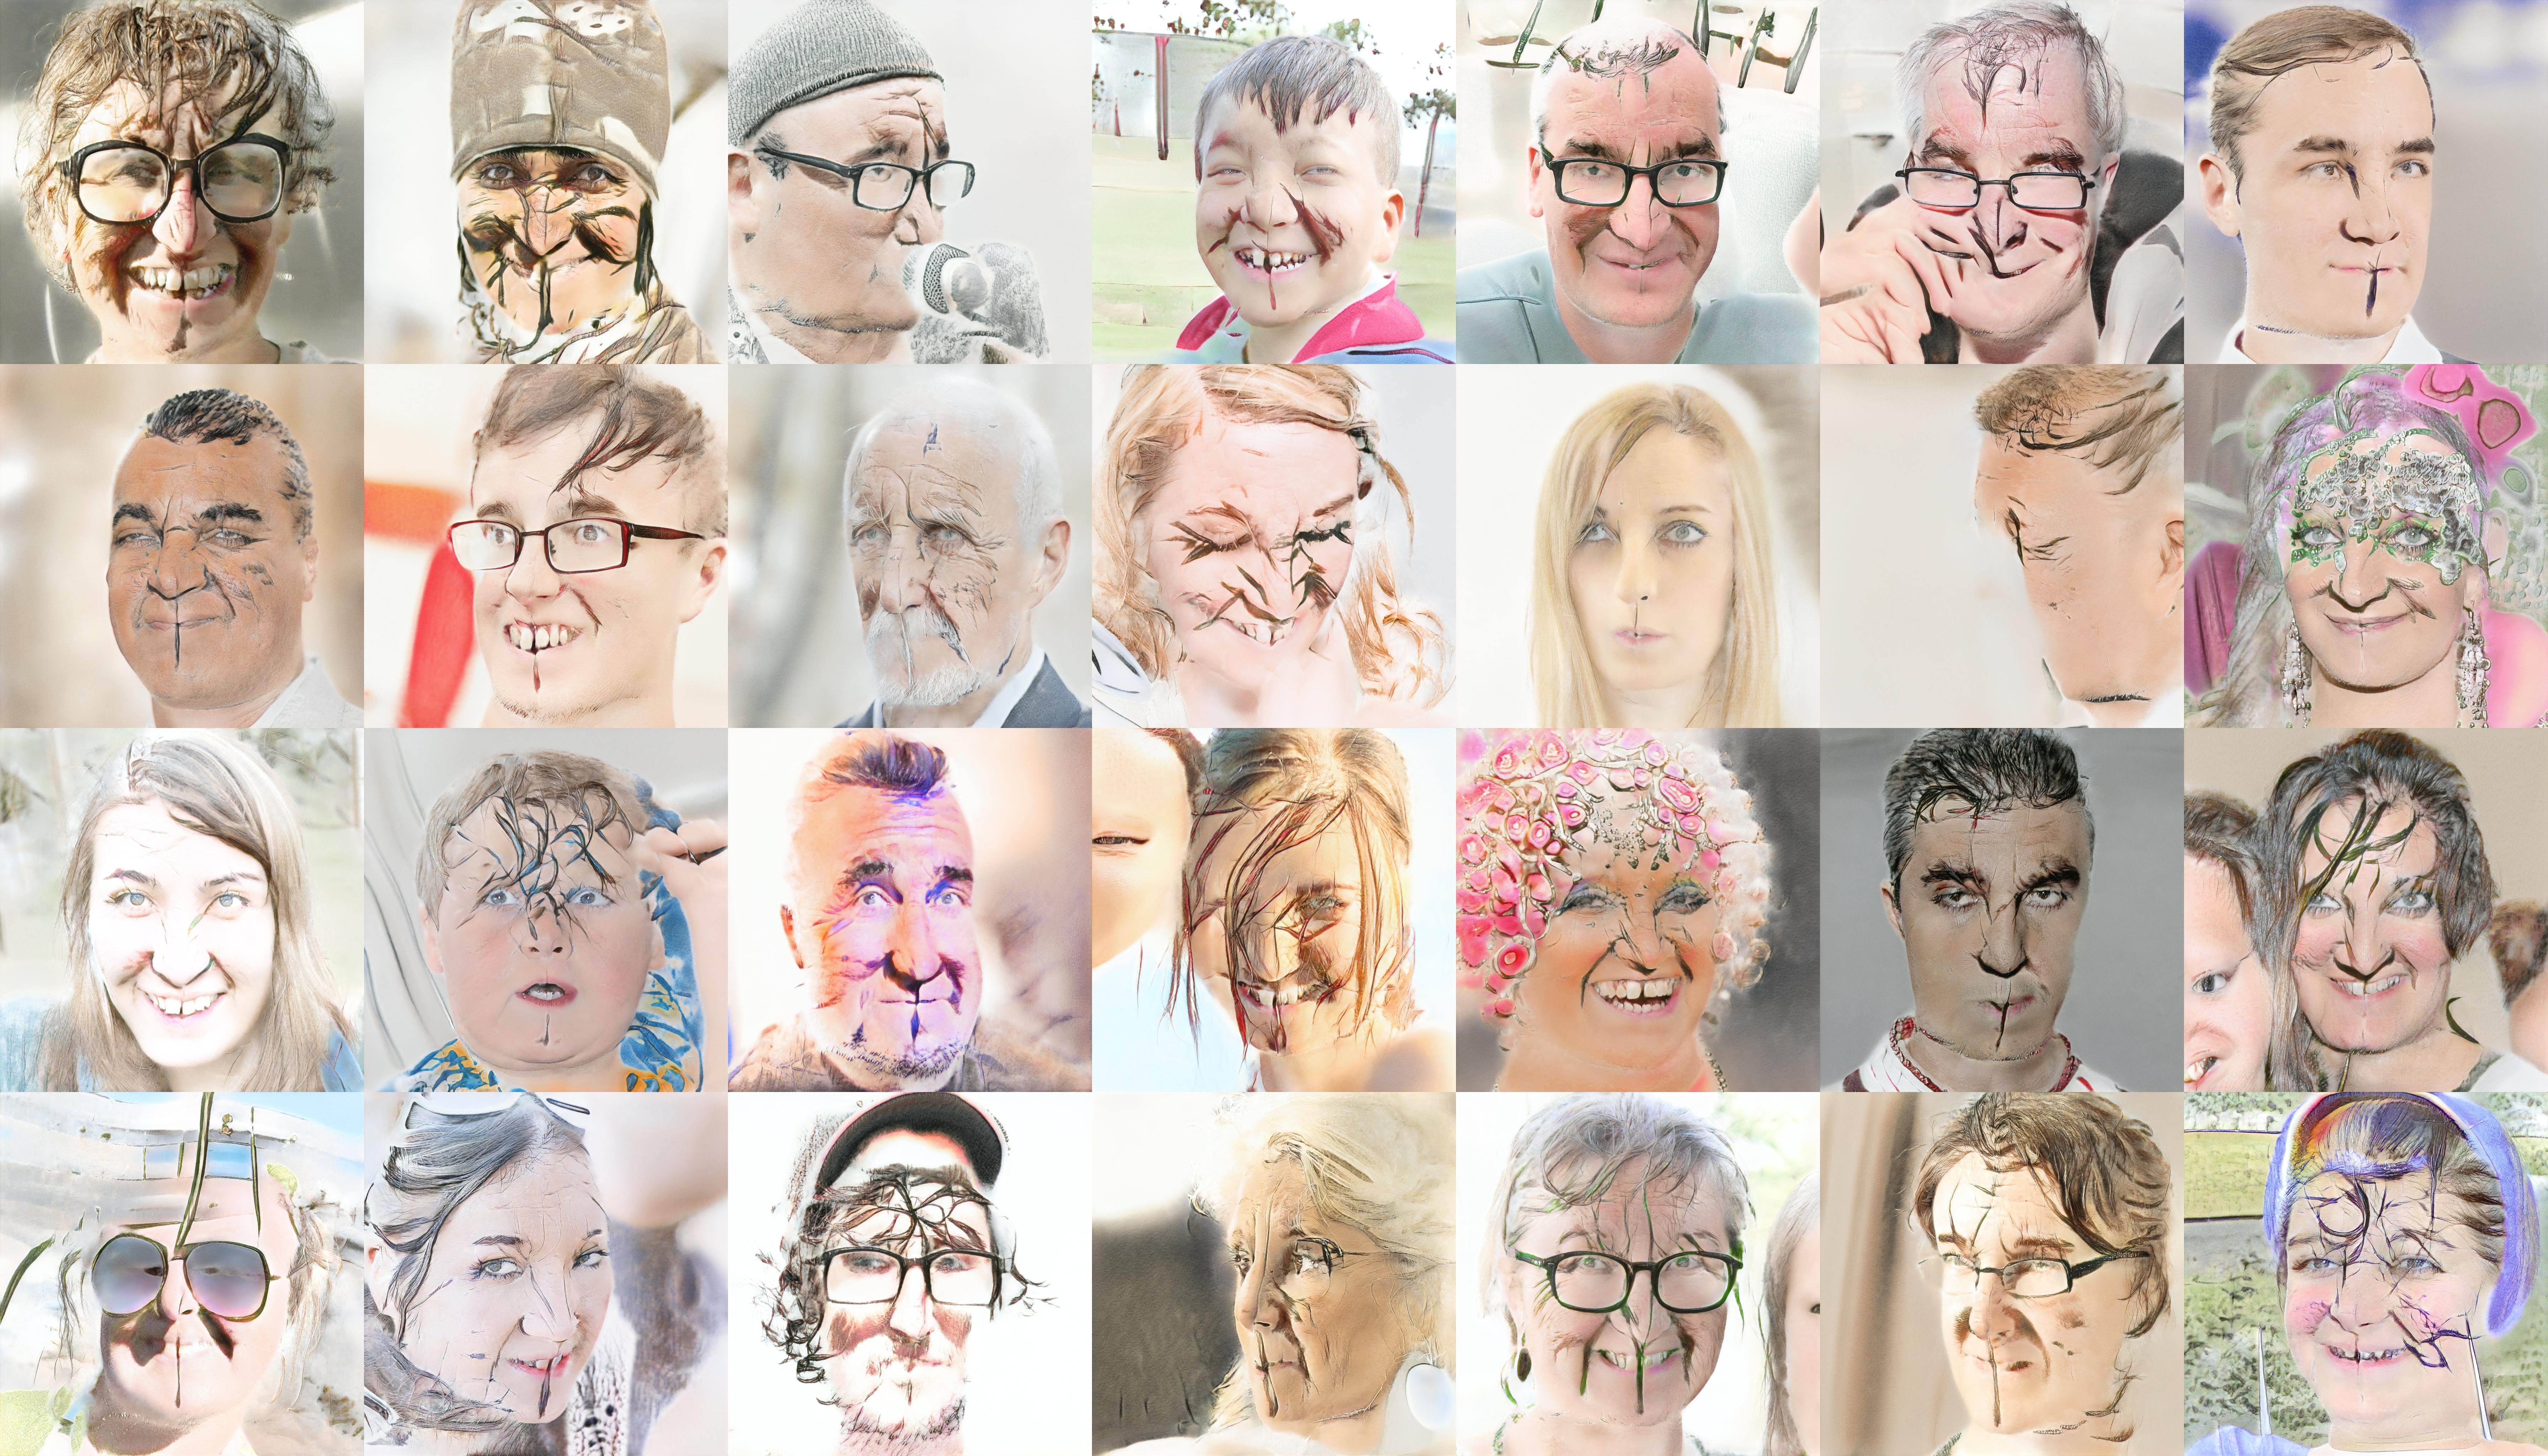
It’s worth keeping an eye on the snapshot sample images for problems that can occur, such as training collapse. This is when the training fails and the model only produces a few different variations of image, or stops creating images altogether. My first attempt at training collapsed almost immediately, producing nothing but a sludgy mess.
It’s not always clear why training collapses as GANs rely on a delicate balance between the two component networks, but common factors include the dataset being too small or that it contains too many duplicate images.
Generating images and video
I used a few different Colab notebooks to generate the output:
This notebook by Jeff Heaton creates static images and interpolation videos. It has good instructions, but to make it work with my model I replaced the paths to the pre-trained models with the path to my own stored in Google Drive.
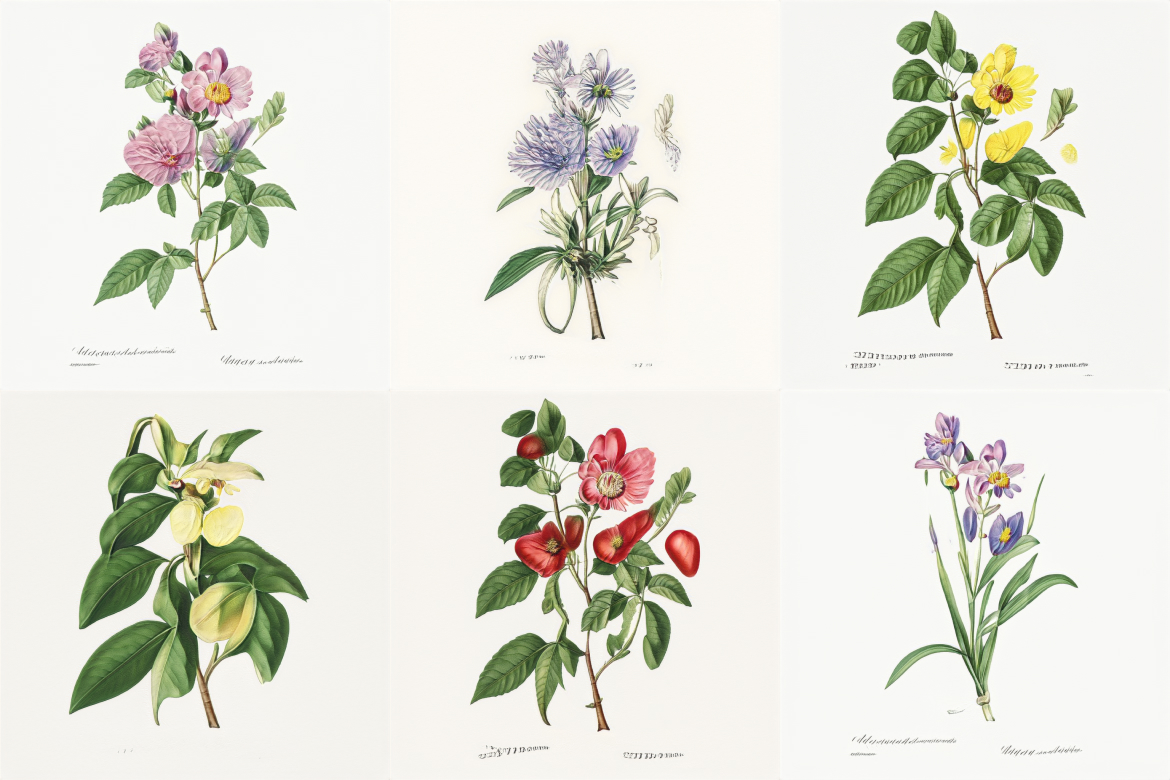
↑ A few plants that don't exist.
Flesh Digressions creates looping videos with an interesting distortion effect.
↑ Flesh digressions.
StyleGAN3 is able to produce much smoother interpolations than StyleGAN2, so I used it to create the interpolation animations. Again, I edited the default model paths to make it work with my model.
Processing the results
Image upscaling
As images are limited to 1024px, an AI upscaler is needed to make them larger without losing resolution. Options include:
- Topaz Labs Gigapixel AI – Expensive but great quality.
- SwinIR – High quality, using a very recent model. The linked Colab notebook will also upscale with a few other models including ESRGAN and BSRGAN.
- Other options include Waifu2x and BigJPG, although the results aren’t often as good.
Video upscaling
The best option is Topaz Labs Video Enhance AI. It’s expensive, but produces excellent results. The downside is that it runs locally, meaning it needs powerful hardware. For example, it took three days to upscale a 10 minute video on my M1 MacBook Air.
Motion interpolation and video time-warping
RIFE can change the frame rate to 30 or 60fps and slow the video by a factor of 2, 4 or 8 times, smoothly interpolating between frames. It’s worth using even if you don’t want to slow the video, just for the smoothness of motion it produces.
Final thoughts
It’s been hugely fun training a model with StyleGAN and creating images and video from it. I feel like I’m only just scratching the surface of what’s possible and I’m excited and a bit daunted as to how much there is to find out. Hopefully this quick overview will help you get started with creating your own model and be excited by the possibilities as well.